• Spring naar de hoofdnavigatie
  • Door naar de hoofd inhoud
  • Spring naar de eerste sidebar
  • Spring naar de voettekst
GHENTlemen's BBQ
  • Algemeen
    • Over GHENTlemen’s BBQ
  • Workshops
  • BBQ Recepten
    • Gangen
      • Drankjes
      • Hapjes / Tapas
      • Voorgerechten
      • Hoofdgerechten
      • Bijgerechten
      • Salades
      • Desserts
    • BBQ Klassiekers
    • Feestelijk Barbecuën
    • Low & Slow
    • Vegetarisch
    • Wild op de BBQ
  • Tips & Tricks
    • De BBQ Internetbibliotheek
    • De BBQ Bibliotheekkast
    • BBQ Restaurants
  • Contact
  • Navigation Menu: Social Icons

    • Facebook
    • Instagram
    • Pinterest
    • Twitter
Je bent hier: Home / Recepten / Drankjes / Gegrilde Limonade, een Heerlijke Verfrissing

Gegrilde Limonade, een Heerlijke Verfrissing

augustus 12, 2020 By Michel

Naar recept gaan Recept afdrukken

Gegrilde limonade

We zitten middenin een hittegolf en toch gaat hier de BBQ nog aan. Waarom? Om iets verfrissends te maken. Jawel, je leest het goed! We maken iets verfrissend op de BBQ. Namelijk gegrilde limonade. Een meer dan welkome verfrissing met deze temperaturen.

grill de citroenen
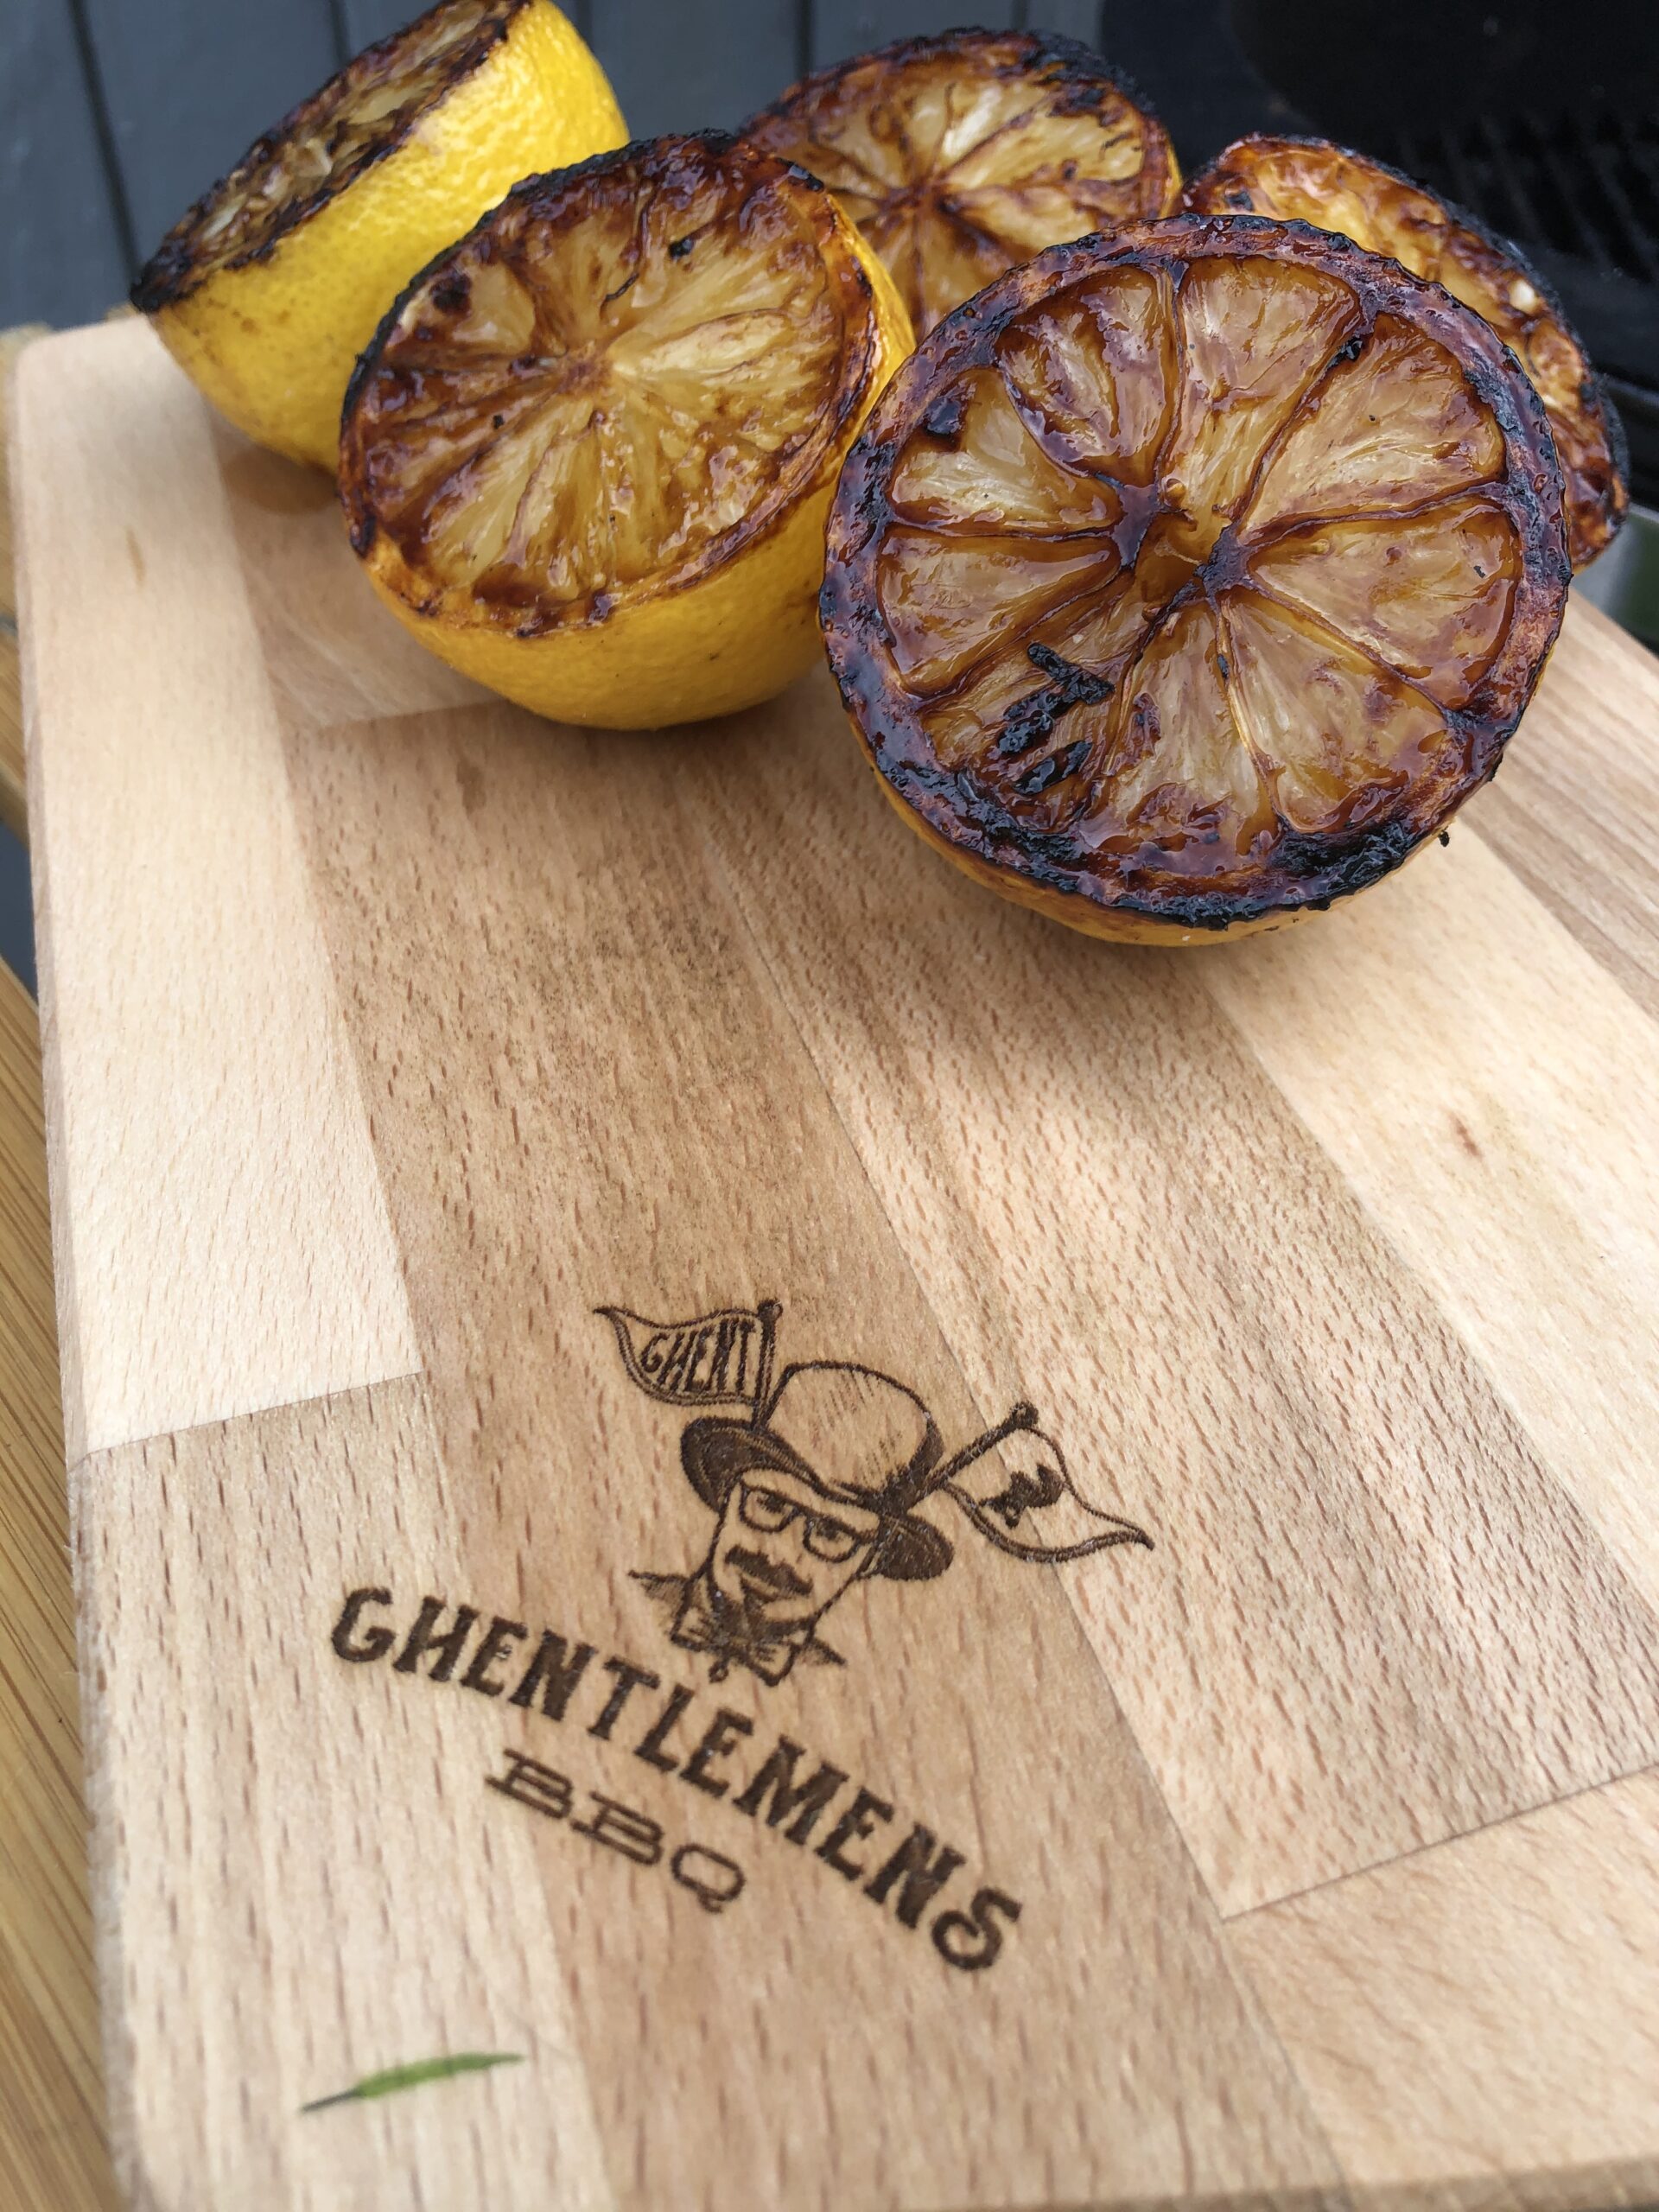
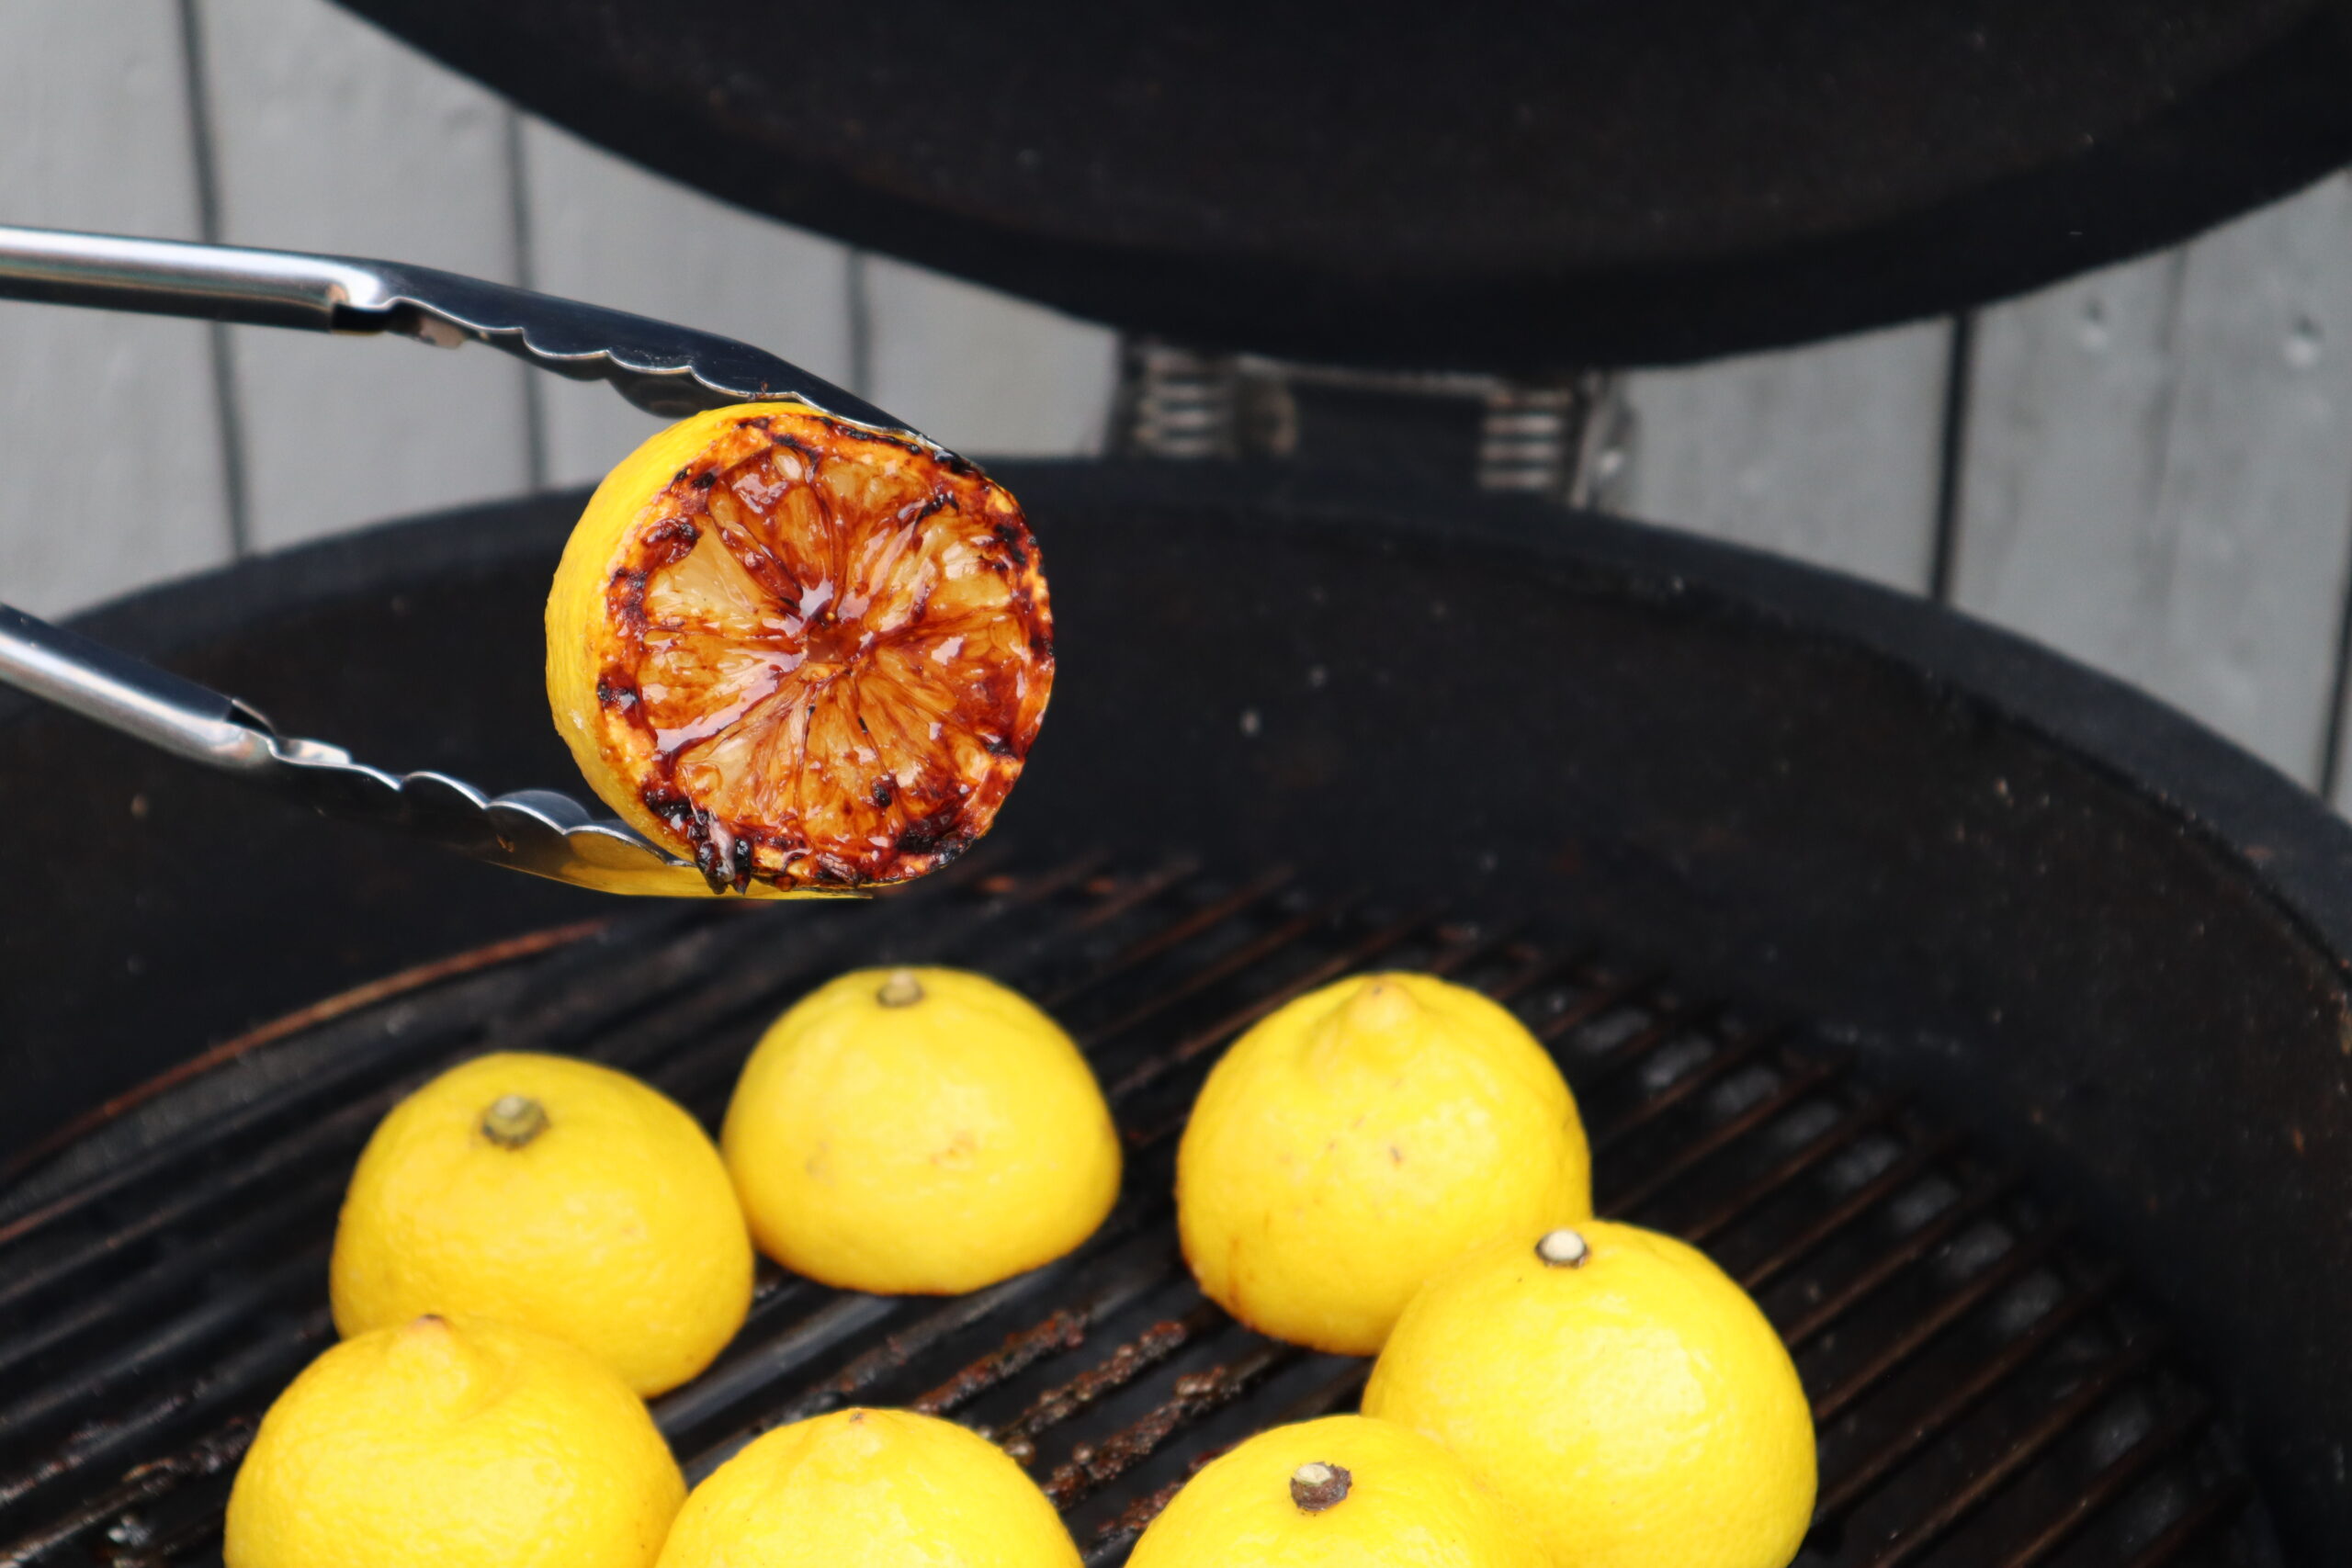
Om de limonade méér BBQ te maken hebben we de citroenen gegrild alvorens ze uit te persen. Maar voor we dat gedaan hebben, hebben we de citroenen gehalveerd en het vruchtvlees in suiker gedopt. Op deze manier zal bij het grillen de suiker carameliseren en dus een lekkere smaak afgeven. De citroenen grillen we met het vruchtvlees op de rooster voor zo’n 3 minuten, of tot de suiker goed gecarameliseerd is. Zo krijgen we dus gegrilde limonade.

Daarna laten we de citroenen wat afkoelen voor we ze uitpersen. Zorg ervoor dat ze nog lauw zijn, want dan persen ze nog zo makkelijk. Dit vruchtensap gaan we dan mengen met een suikersiroop.

Een mengeling van half suiker en half water dat we even laten inkoken tot de suiker is opgelost. We laten deze siroop volledig afkoelen voor we er het citroensap bij doen.

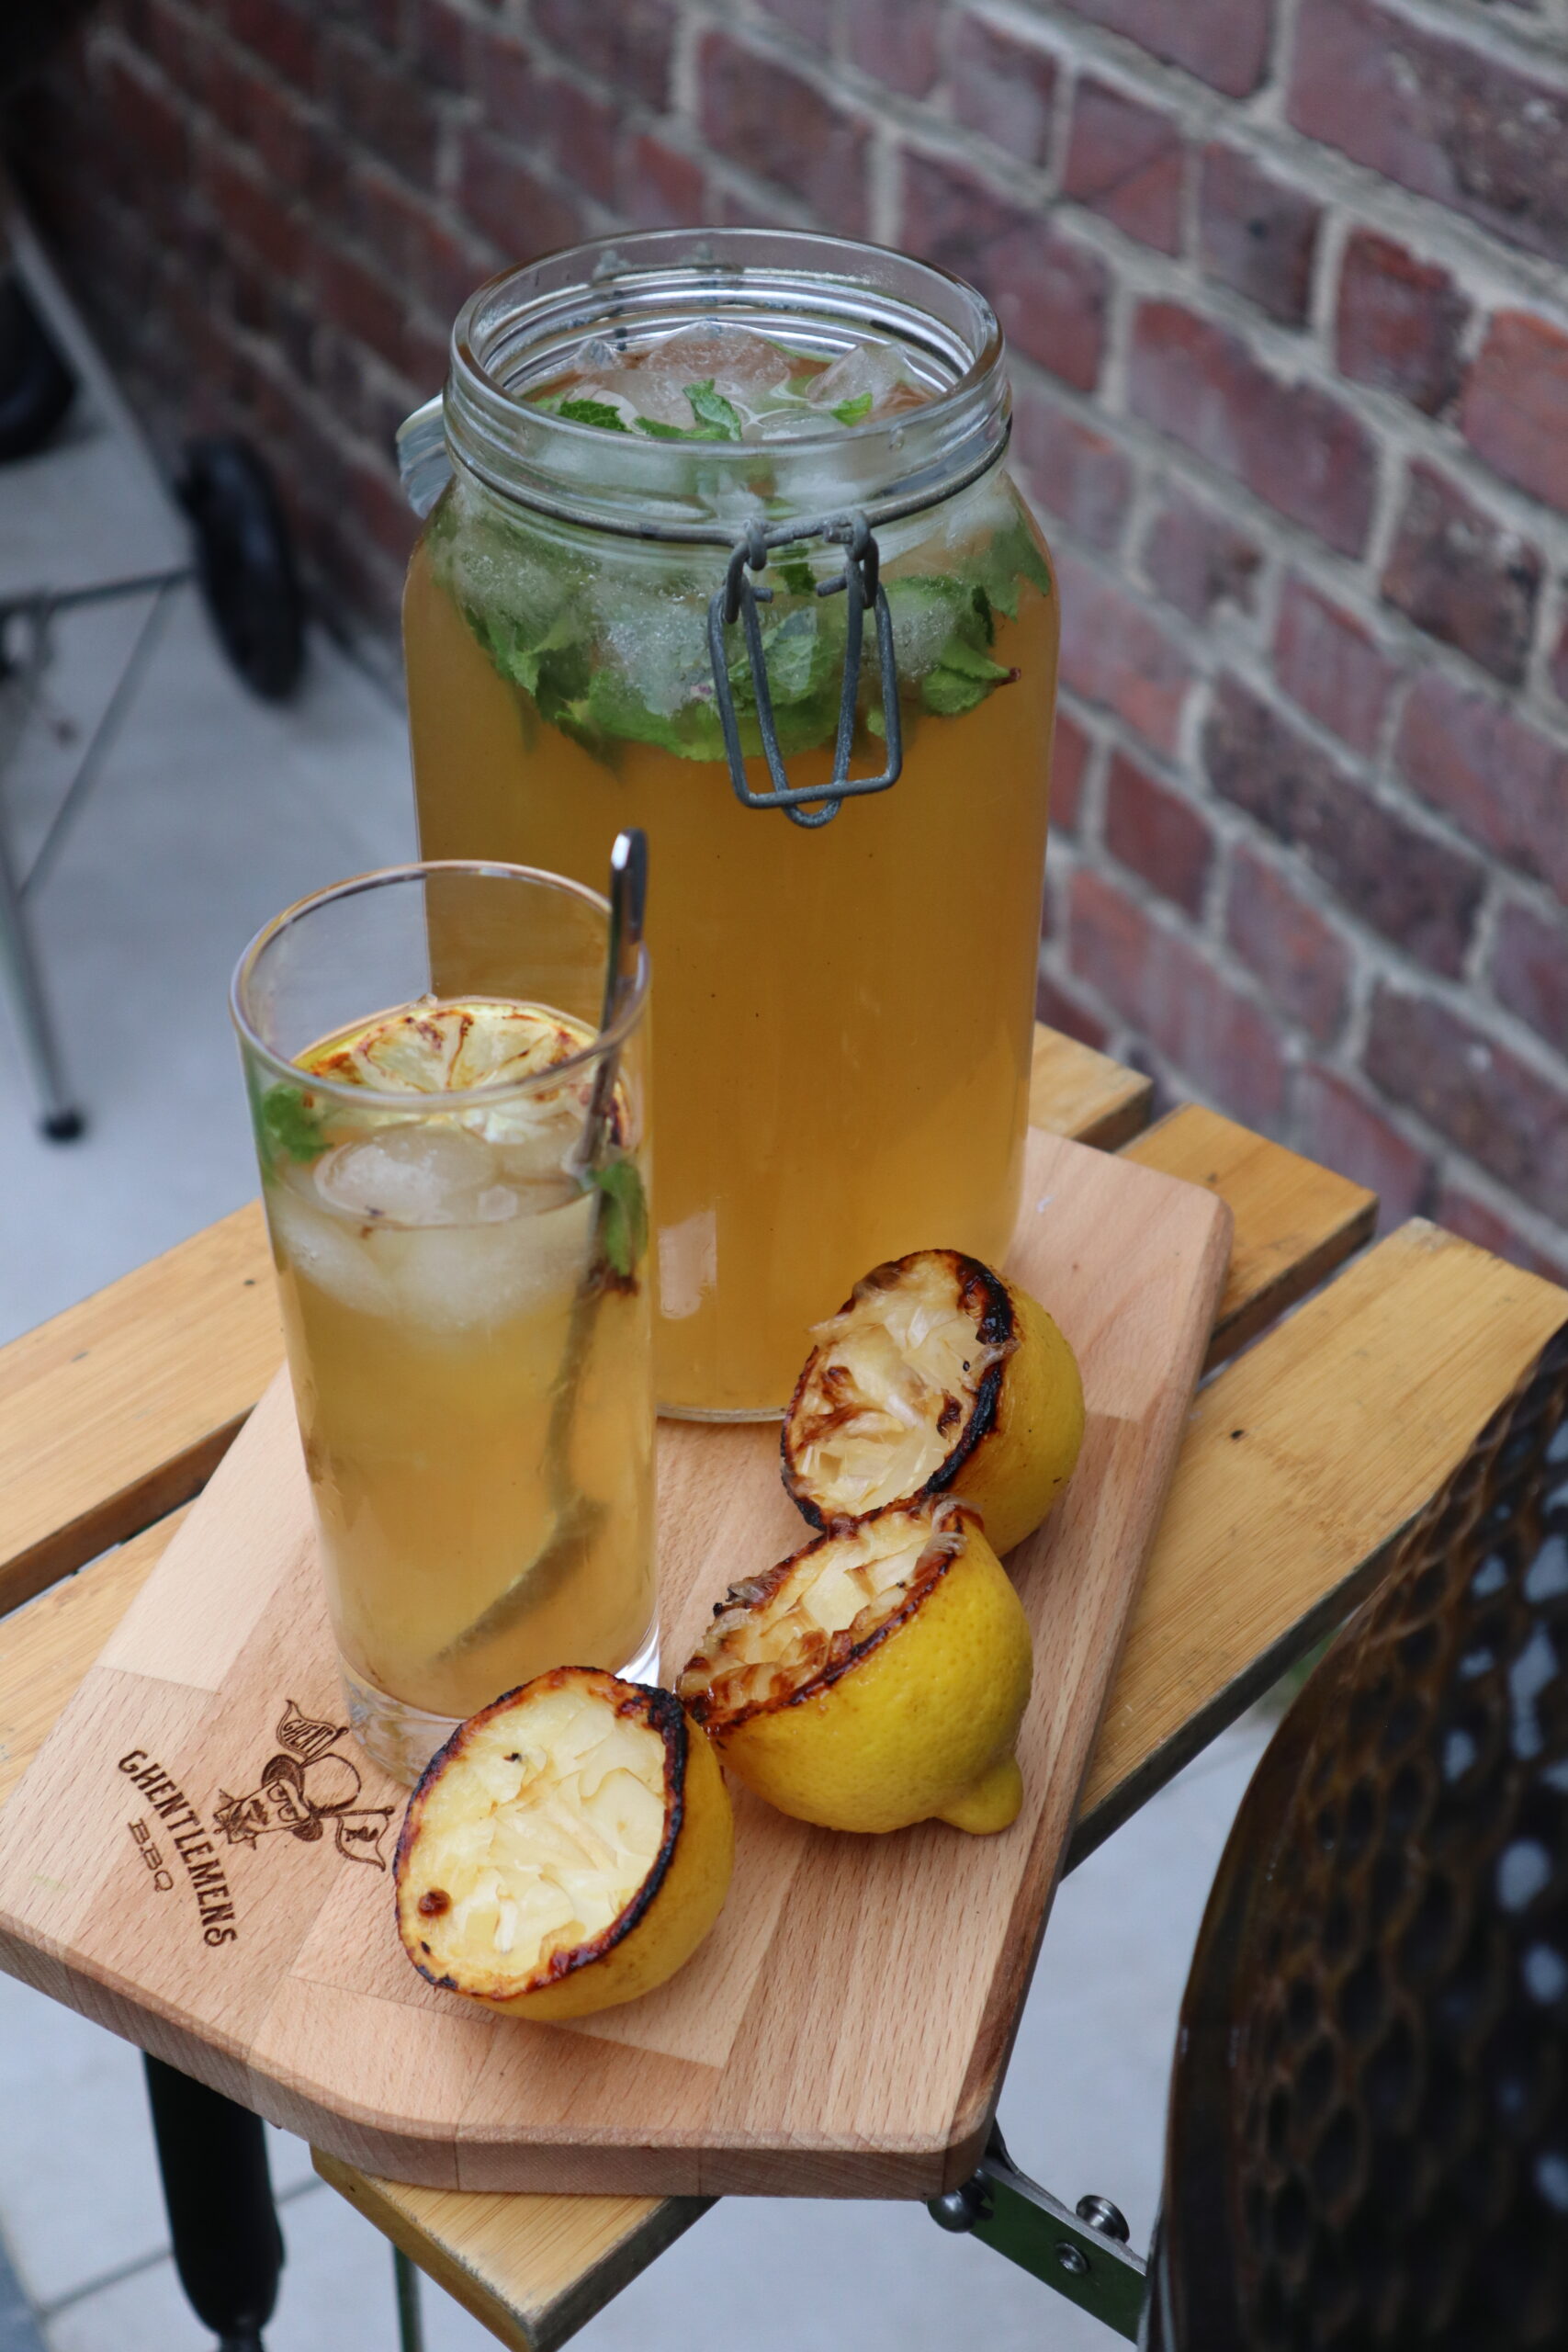
Daarna doen we er een halve liter water bij en ongeveer een halve liter ijsklontjes. We kneuzen wat muntblaadjes in de hand om ook toe te voegen aan de limonade. We kneuzen deze blaadje zachtjes,  omdat er op deze manier er meer aroma vrijkomt van de munt. En om af te werken voegen we nog wat gember toe.

Om te serveren snij je nog een paar plakjes citroen, die je ook in suiker dept en dan afgrilt. Het oogt niet alleen mooi in het glas, maar geeft ook een geweldige smaak af.

Nog een kleine tip uit ondervinding: maak meer!!! Deze gegrilde limonade had zo’n succes dat het heel snel op was. Daarnaast kan je deze limonade pimpen met Gin, Jack Daniels whiskey of andere sterke dranken. Neem hier een kijkje om je limonade te gaan upgraden

Op zoek naar gerechten die passen bij deze limonade? Probeer dan zeker een van deze gerechten uit:

  • Zomerse Sardines
  • Volledige Zalm in Krantenpapier
  • Gegrilde Aubergine met Berloumi
  • Oosterse Kippenbrochette
  • Gegrilde Koolsteak met Blauwe Kaas
Recept afdrukken

Heerlijk verfrissende Gegrilde Limonade

Voorbereidingstijd20 minuten min
Bereidingstijd5 minuten min
Totale tijd25 minuten min
Gang: Drankjes
Keuken: BBQ
Trefwoord: citroen, limonade, vanille suiker
Porties: 8 glazen van 25 cl

Equipment

  • Fruitpers
  • BBQ

Ingrediënten

Voor de siroop:

  • 125 ml water
  • 125 gr suiker

Voor de limonade:

  • 8 citroenen, gehalveerd
  • 2 eetlepels suiker
  • 1/2 liter koud water
  • 1/2 liter ijsklontjes
  • 1 eetlepel muntblaadjes, gekneusd
  • 1 blokje gember, 2cm op 2 cm, geschild

Instructies

Voor de siroop:

  • Doe de suiker en het water in een pan en breng aan de kook. Laat zo'n 5 minuten zachtjes koken tot de suiker is opgelost en laat dan alles afkoelen.
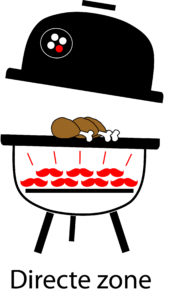
  • Maak de BBQ klaar om direct te grillen op medium hoge temperatuur van 180 - 200°C.
    Directe zone Grillen BBQ

Voor de limonade:

  • Halveer de citroenen en dep het vruchtvlees in een laag suiker. Leg de citroenen nu met het vruchtvlees en de suiker op de grill, direct boven de kolen.
    suiker op de citroenen
  • Grill de citroenen zo'n 3 minuten tot de suiker goed gecarameliseerd is.
    grill de citroenen
  • Verwijder de citroenen van de grill en laat ze wat afkoelen tot je ze makkelijk kan vastnemen om uit de persen.
    gegrilde citroenen
  • Giet het citroensap in een kruik, doe er de siroop, het water, de ijsklontjes, de muntblaadjes en de gember bij. Roer alles goed om. Laat nog even koelen en serveer om af te koelen...
  • Cheers!
    Gegrilde limonade


Categorie: Drankjes, Hapjes / Tapas Tags: citroen, gember, limonade, muntblaadjes, siroop, suiker

Vorig bericht: « Burger Bun, het Geheime Recept van Bakkerij Cloet
Volgend bericht: Bevroren Steak Experiment »

Primaire Sidebar

ghentlemens_bbq

🔥 Here’s a quick how-to: Season the picanha w 🔥 Here’s a quick how-to: Season the picanha with rock salt, let it marinate, then skewer it fat side up. Grill over high heat until crispy on the outside, medium-rare inside. Slice against the grain for that melt-in-your-mouth perfection. 🍽️✨ 

#ChurrascoMastery #GrillingGoals #picanha #steak #picanhas #churrasco #churrascaria #churrascada #picanhanabrasa #picanhagrill #bbqblogger #belgianbbq
🔥 Steak with a crust 🔥 Rate this sound of th 🔥 Steak with a crust 🔥
Rate this sound of the crust on this steak. Is’t this the best sound you can get from a steak?
Get this result with the reverse sear method. Heat the steak and at the last moment sear in over a blasting hot grill

#Steaks #Meatlover #Steakdinner #Steak #Grilling #Bbqlife #Steaklover #Meatporn #Mediumrare #Steaknight #Beef #Steakporn #Ribeyesteak #Barbecue #Tomahawksteak #Tbonesteak #Bbq #Meat #Steaklovers #Grill #Bbqporn
🔥 full plate 🔥 Lokken for side dishes? Easy, 🔥 full plate 🔥
Lokken for side dishes? Easy, all veggies are possible. Challenge yourself and try veggie recipes. I know myself veggies and sides are not my forte, but it’s great to try out things and challenge myself…

What are you favourite veggies and sides?

#bbq #vegetables #foodlove #charcoal #foodinspiration #bbqlovers #bbqporn #veggielover #grilledveggies #grillsaison #bbqveggies #bbqinspiration #bbqmaster #piaster #bbqblogger #belgianbbq
🔥 Pastrami for Lunch? 🔥 What’s for lunch? 🔥 Pastrami for Lunch? 🔥
What’s for lunch?

#bbq #meat #grilling #meatlover #bbqlife #pastrami #meatsweats #bbqsmoker #bbqfamily #bbqgrill #bbqmaster #bbqaddiction #bbqnight #meatfeast #bbqing #pastramisandwich #bbqdinner #pastramilovers #pastramionrye #pastramiburger #hotpastrami
🔥 Tomapork 🔥 Hot searing is the perfect way 🔥 Tomapork 🔥
Hot searing is the perfect way to create a nice crunchy crust on meat. Excellent for pork meat.
🔥Morning rituals: 🔥 Woke up and realized I h 🔥Morning rituals: 🔥
Woke up and realized I had two true loves – coffee and chicken wings on the BBQ. Because who needs a balanced breakfast when you can have a caffeinated chicken fiesta at sunrise? ☕🍗 Embracing the chaos, one cup of coffee and one wing at a time. 

#MorningMadness #WingedAwakening #wings #bbqwings #coffee #bbq #breakfastbbq #chickenwings #grilledwinfs #buffalowings #breakfastcoffee #belgianbbq #bbqblogger
🍕 Step up your pizza game with a Woodfired Oven 🍕 Step up your pizza game with a Woodfired Oven! 🔥 Follow these concrete steps for a perfect homemade pizza:

1. **Prepare the Dough:**
 Start with a classic pizza dough recipe. Mix flour, water, yeast, salt, and a pinch of sugar. Let it rise until doubled in size.

2. **Build the Woodfired Oven:**
 Construct a woodfired oven using bricks and concrete. Ensure proper insulation for even heat distribution. Let it cure according to concrete specifications.

3. **Ignite the Fire:**
 Build a fire inside the oven using hardwood logs. Let it burn until the interior reaches the desired cooking temperature (usually around 700°F/370°C).

4. **Roll out the Dough:**
 Roll your pizza dough into the desired thickness. A thinner crust is ideal for woodfired ovens.

5. **Top it Up:**
 Add your favorite sauce, cheese, and toppings. Keep it simple for the woodfired flavor to shine through.

6. **Use a Peel:**
 Place your pizza on a pizza peel dusted with flour or cornmeal for easy transfer into the hot oven.

7. **Into the Oven:**
 Slide the pizza onto the hot oven floor. Rotate it occasionally for an even cook, usually 2-5 minutes.

8. **Watch and Enjoy:**
 Keep a close eye on your pizza. Once the crust is golden and the cheese is bubbly, your woodfired masterpiece is ready!

9. **Serve Hot:**
 Take it out, let it cool for a moment, slice, and enjoy the incredible flavor of a woodfired pizza!

#WoodfiredPizza #HomemadePizza #PizzaLovers #WoodfiredOven #PizzaTime 🚀
Embracing the festive vibes with a twist! 🎄🥧 Embracing the festive vibes with a twist! 🎄🥧 Grilled minced pie topped with a Christmas tree cookie—because holiday treats are better with a BBQ touch! 🔥✨ Prepared at the @pitt.outdoor PITT master workshop. 

#ChristmasFlavors #BBQTreats #FestiveDelights #mincedpie #bbqlincedpie #bbqmenu #xmassbbq #bbq #bbqfun #bbqfamily #bbqnation @bbqpitmaster #bbqbelgium #pitmaster #bbqpitmaster #belgianbbq #bbqblogger
🍗✨ Grilling Magic: Rotisserie Chicken on Gas 🍗✨ Grilling Magic: Rotisserie Chicken on Gas BBQ! ✨🔥

Step 1️⃣: Prep the bird 🐔
Start with a fresh chicken. Pat it dry with paper towels, then generously season with salt, pepper, and your favorite herbs. Let it marinate for at least 30 minutes.

Step 2️⃣: Secure the chicken 🔄
Skewer the chicken onto the rotisserie rod, ensuring it’s balanced for even cooking. Use prongs to secure the wings and legs, keeping everything snug.

Step 3️⃣: Fire up the BBQ 🔥
Preheat your gas BBQ on medium-high heat. Aim for a consistent temperature around 350°F (175°C). Place a drip pan underneath to catch those flavorful drippings.

Step 4️⃣: Set the rotisserie in motion 🔄
Turn on the rotisserie motor and let the magic begin! Close the lid to lock in heat and moisture. This slow rotation ensures a juicy, evenly cooked chicken.

Step 5️⃣: Baste for flavor 💦
Every 20 minutes, brush the chicken with a tasty basting sauce. Mix olive oil, garlic, lemon juice, and your favorite herbs for an irresistible flavor boost.

Step 6️⃣: Check the temp 🌡️
After about 1.5-2 hours, use a meat thermometer to check the internal temperature. Aim for 165°F (74°C) in the thickest part of the meat. Adjust cooking time if needed.

Step 7️⃣: Rest and carve 🍽️
Let the chicken rest for 10 minutes before carving. This allows juices to redistribute, keeping the meat moist. Slice, serve, and watch those smiles appear! 😋🍴

Step 8️⃣: Share your masterpiece! 📸
Snap a pic of your perfectly grilled rotisserie chicken and share the deliciousness with friends. Tag #BBQMasterChef for a chance to be featured! 📷🔥

Happy grilling! 🎉 #GrillAndChill #RotisserieChickenLove #RotisserieChicken #BBQDelights #GrillMaster #BBQLife #ChickenOnTheRotisseri #FlavorfulGrilling #BBQMagic #GrillAndChill #JuicyChicken #BBQSeason #RotisserieLove #SmokedChicken #BBQGoals #GrillTime #foodieadventure
Meer laden… Volgen op Instagram

Populaire BBQ recepten

Ghentlemens BBQ Gekarameliseerde Appels
GHENTlemens BBQ Moelleux18
De fik erin potato wedges
GHENTlemens BBQ Buffalo Wings met Blauwe Kaas dip
Meloen Feta salade Ottolenghi

Footer

Volg ons:

  • Facebook
  • Instagram
  • Pinterest
  • Twitter

Copyright © 2023 · GHENTlemen's BBQ · Log in