• Spring naar de hoofdnavigatie
  • Door naar de hoofd inhoud
  • Spring naar de eerste sidebar
  • Spring naar de voettekst
GHENTlemen's BBQ
  • 🔥 BBQ & PIZZA TEAMBUILDINGS IN GENT
  • Algemeen
    • Over GHENTlemen’s BBQ
  • BBQ Recepten
    • Gangen
      • Drankjes
      • Hapjes / Tapas
      • Voorgerechten
      • Hoofdgerechten
      • Bijgerechten
      • Salades
      • Desserts
    • BBQ Klassiekers
    • Feestelijk Barbecuën
    • Low & Slow
    • Vegetarisch
    • Wild op de BBQ
  • Tips & Tricks
    • De BBQ Internetbibliotheek
    • De BBQ Bibliotheekkast
    • BBQ Restaurants
  • Contact
  • Navigation Menu: Social Icons

    • Facebook
    • Instagram
    • Pinterest
    • Twitter
Je bent hier: Home / Recepten / Hoofdgerechten / BeerCan Chicken of Drunken Chicken

BeerCan Chicken of Drunken Chicken

augustus 8, 2014 By ghentlemensbbq

Naar recept gaan Recept afdrukken

Beercan Chicken

Wil je iets grappig én lekker klaarmaken op de BBQ zonder daar al te veel moeite in te stoppen? Dan zit je hier op het juiste adres. De beercan chicken is dit alles.

Het principe is heel eenvoudig: je stopt een blikje bier in de kont van de kip en zet deze op de barbecue. Klaar! Eén voorwaarde is er echter dat je een deksel hebt op je barbecue. Je moet namelijk een “oveneffect” kunnen creëren om de kip langs beiden zijdes te laten garen.rook de kip
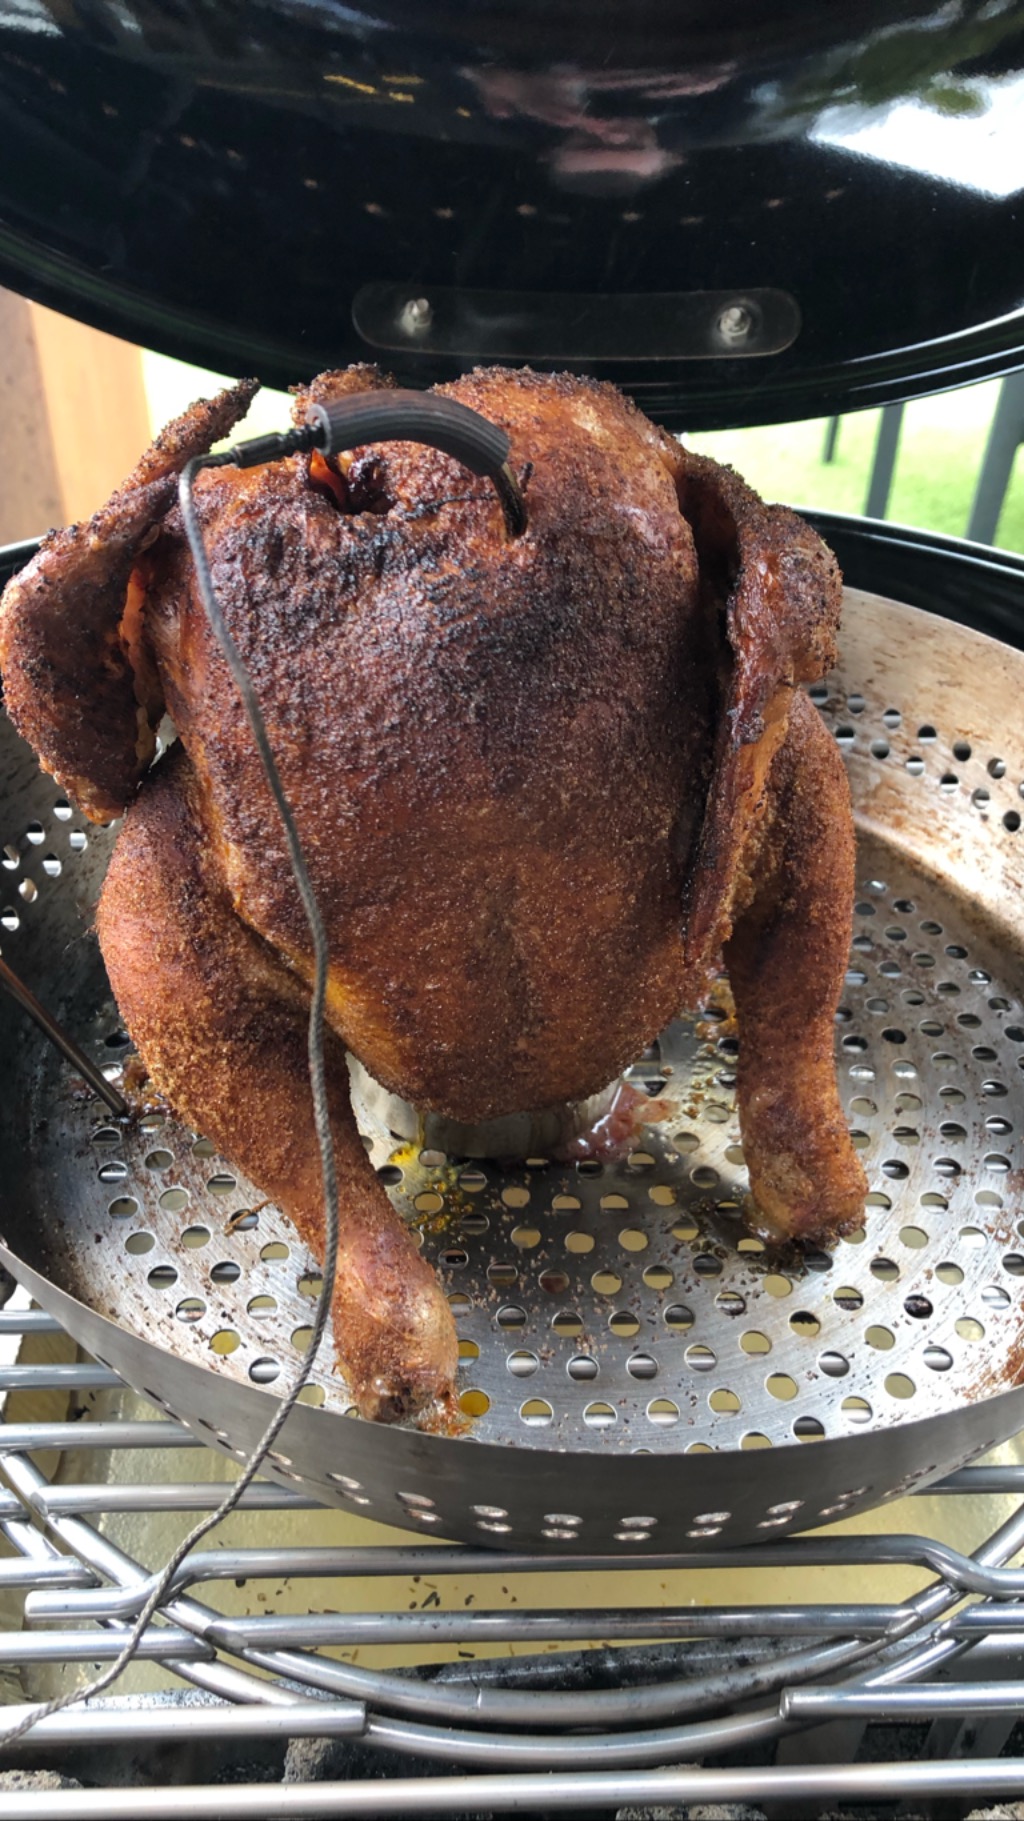
Het leuke aan ons Belgenlandje is dat je de bierblik kip op duizend en één soorten bier kan klaarmaken. Of maak het “alcohol vrij” door met frisdrank te experimenteren… Heel veel smaak zal je echter van het bier niet hebben. De achterliggende gedachte is namelijk dat het binnenste van de kip zal “gestoomd” worden door het verdampen van het bier. Het resultaat is een sappige bierblik kip met een krokant korstje. Ik krijg er opnieuw al het water van in de mond.

Om dit krokant korstje te krijgen moet je eerst de kip gaan inwrijven met olijfolie. De veststof in combinatie met temperatuur zorgt dus bij de beercan chicken voor een lekkere krokante korst. Maak je de kip klaar op een lagere temperatuur zoals 120°C (voor low & slow) dan zal de korst niet de kans krijgen om krokant te worden. Wil je eens een kip low & slow proberen, dan kan je hier het recept voor pulled chicken vinden.Serveer
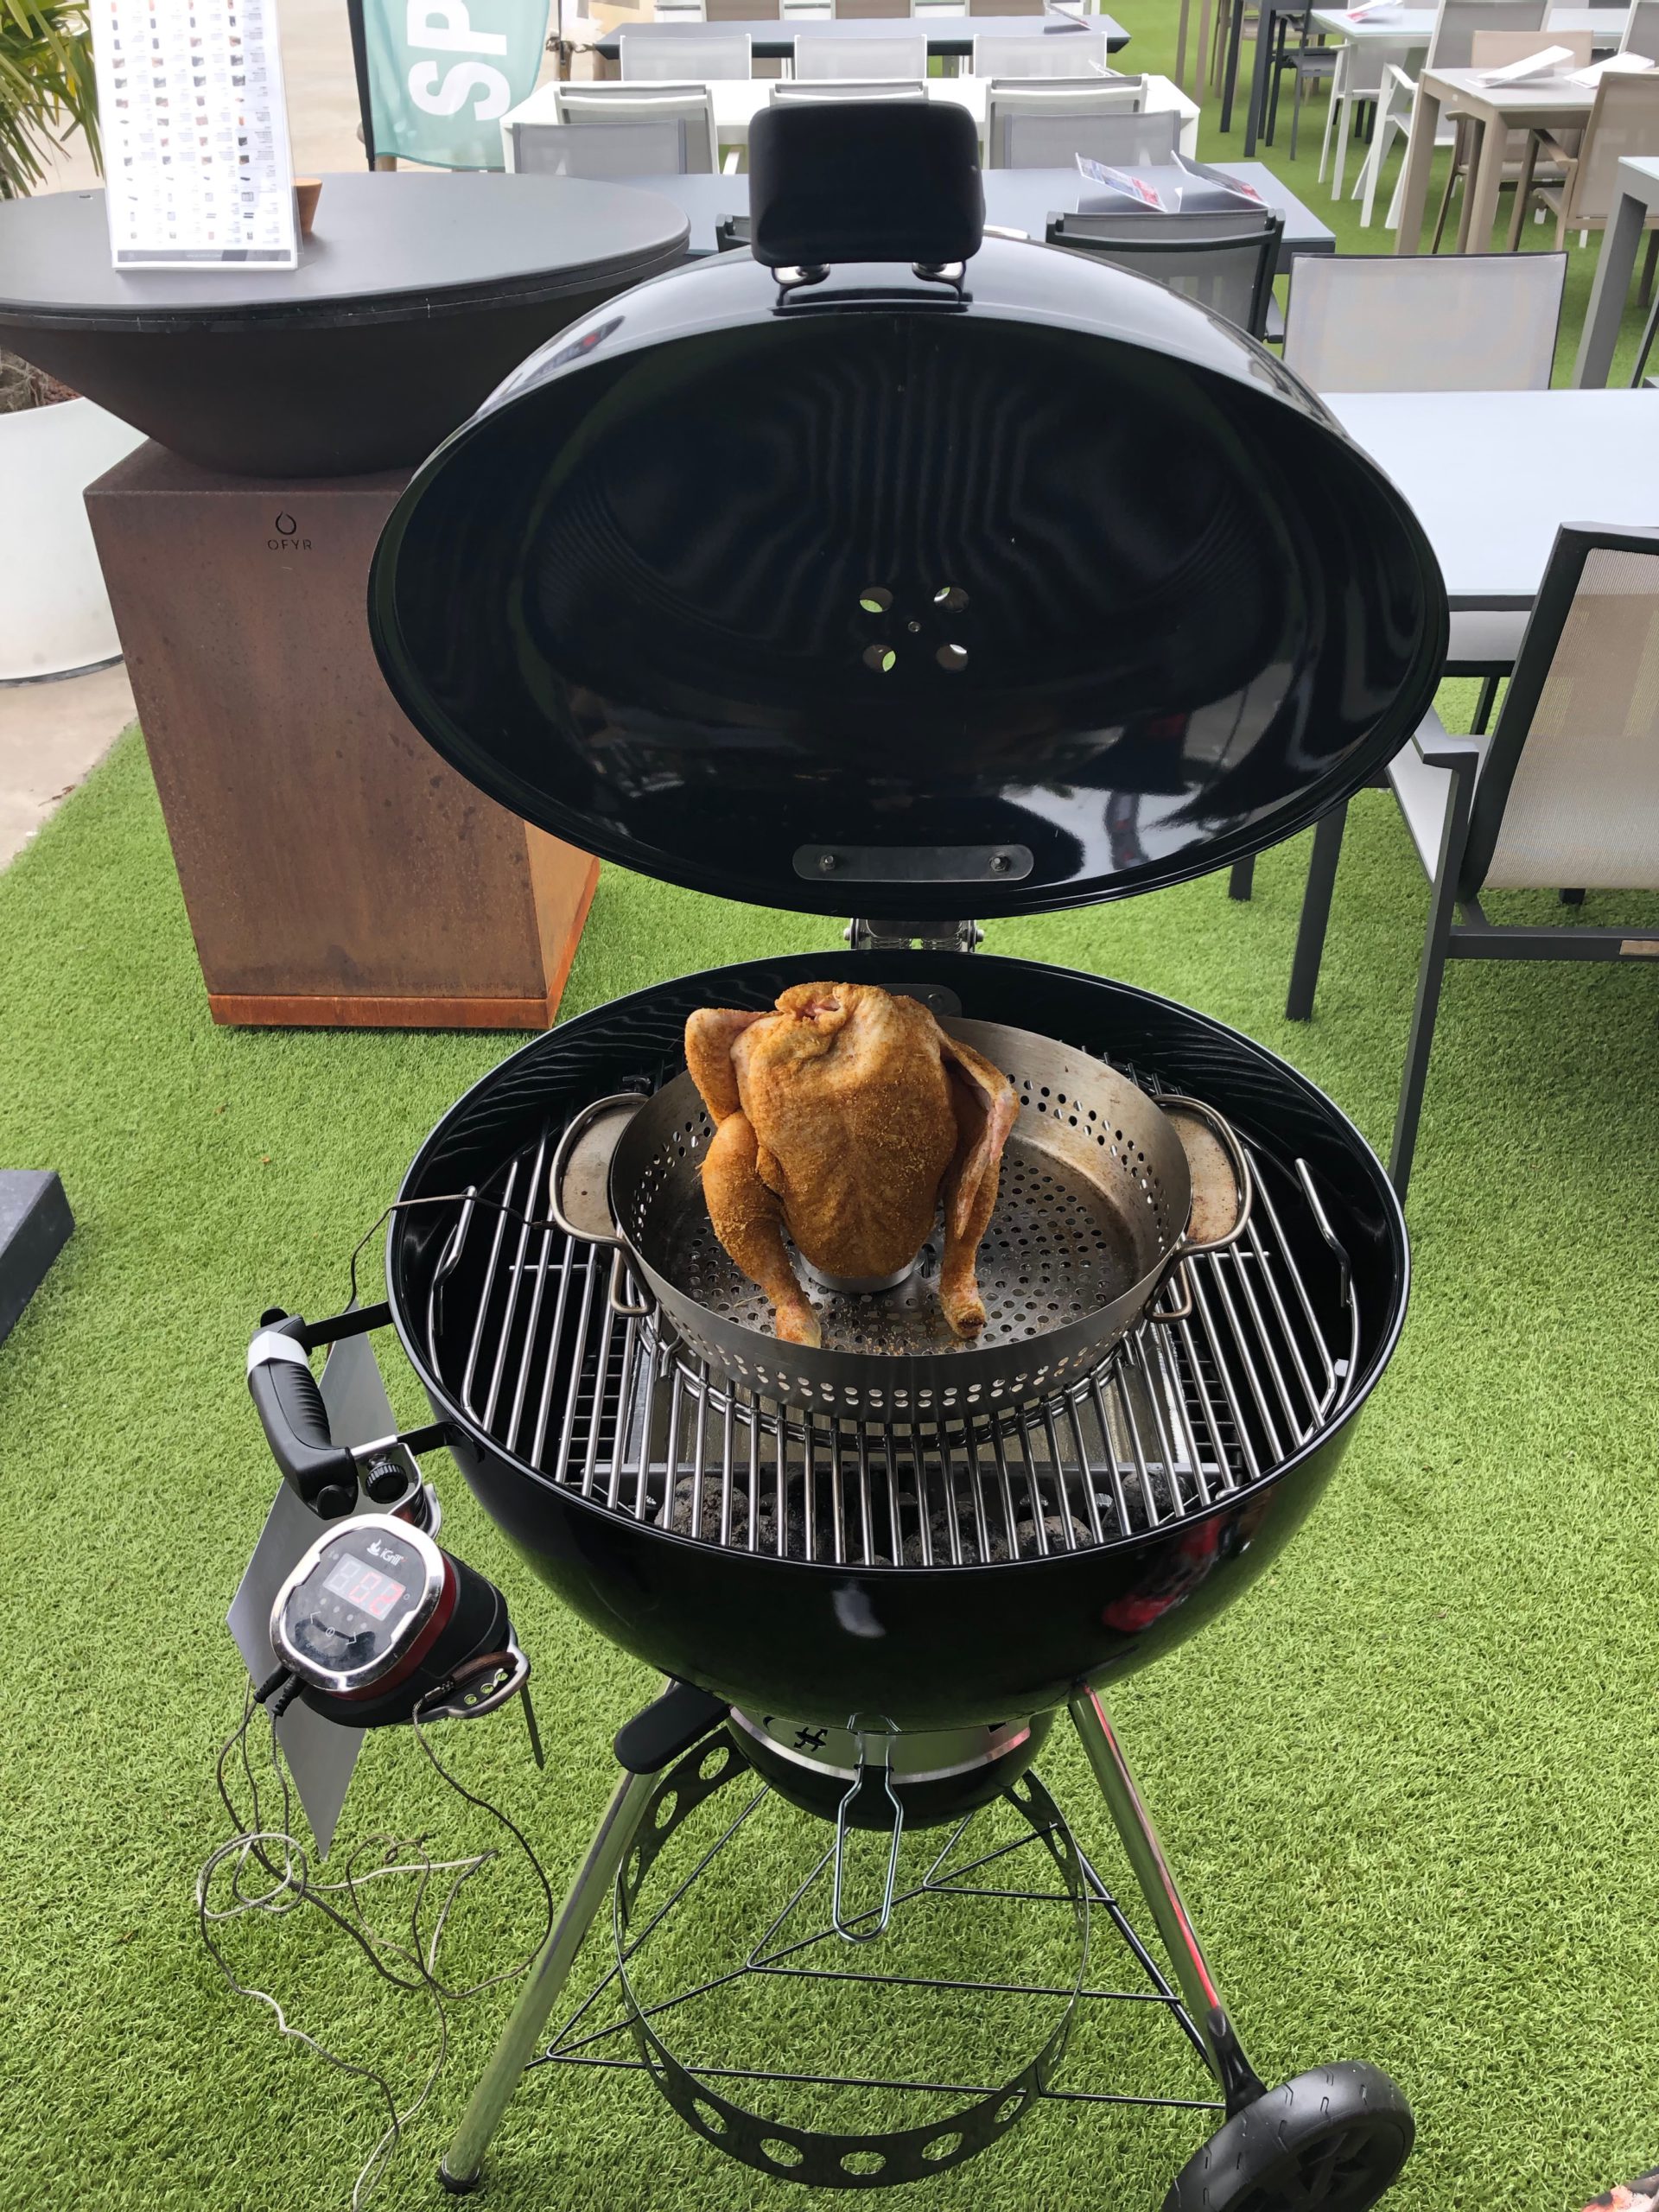
Gebruik voor dergelijke recepten ook altijd een ‘opvangbak’ met water om onder de kip te leggen. Enerzijds zal deze het vet van de (bierblik) kip opvangen, zodat je barbecue niet vuil kan worden. Anderzijds zal het water de temperatuur opnemen en ervoor zorgen dat er een constante temperatuur in de barbecue is. Zo voorkom je echte temperatuur schommelingen. En krijg je dus ook een beter restulataat.

Vind je deze beercan chicken een leuk recept of zoek je meer variaties? Dan kan Beer-Can Chickenvan Steven Raichlen je zeker op weg helpen. In dit boekje gebruikt hij allerlei soorten bier, frisdrank of zelf wijnen om de kip te gaan ‘stomen’. Een leuk boekje dit je doet spelen met smaken en mogelijkheden.

Een andere manier van kip bereiden is de Roadkill of Butterfly Chicken. Deze manier zorgt voor een geweldige gelijkmatig opwarming van de kip. Hierdoor zal je minder snel drogere stukken kip hebben. Ook zal de kip sneller warmen doordat je de kip ‘opengesneden hebt’. Probeer het zeker eens uit, dit is zeker een van mijn favoriete bereidingen.

Recept afdrukken

BeerCan Chicken of Drunken Chicken

Voorbereidingstijd15 minuten min
Bereidingstijd1 uur uur
Rusttijd7 minuten min
Totale tijd1 uur uur 22 minuten min
Gang: Hoofdgerecht
Keuken: Amerikaans, barbecue, BBQ
Trefwoord: beercan chicken
Servings: 4 personen

Equipment

  • BBQ
  • Bierblikje of Beercan-houder

Ingrediënten

  • 1 grote kip
  • favoriete rub of kippenkruiden
  • 1 blikje bier 33cl
  • 2 teentjes look
  • 1 ajuin
  • olijfolie

Instructies

Setup van de BBQ

  • Maak de barbecue klaar om met 3 zones te werken. Je legt kolen links én rechts van je barbecue zodat ze elk maximaal 1/4e innemen.
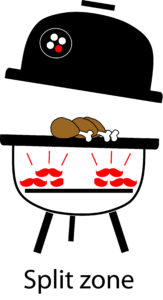
  • Plaats tussen de twee kolen zones een (oven)schotel met water. Deze zal de temperatuur van je barbecue goed vasthouden en vangt het vet van de kip op. Spaart je dus nadien in opkuis werk 😉
  • Zorg dat de barbecue een temperatuur haalt tussen  160° C en 175°C. Medium temperatuur dus.

Bereidingswijze

  • Spoel de kip af met koud water langs buiten én binnen en droog goed af. Verwijder eventueel overtollig vet.
  • Wrijf de kip volledig in met olijfolie zodat de rub of kruiden goed blijven kleven.
  • Wrijf de kip goed in met de rub of een kruidenmengsel zowel langs buiten als binnen.
  • Plaats de vleugels achter de rug van de kip.
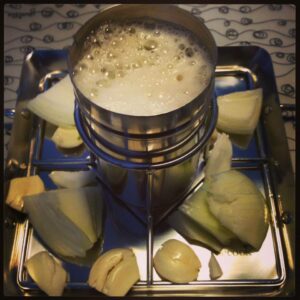
  • Neem een blikje en giet er ongeveer 1/3 uit. Met een mes maak je voorzichtig nog enkele gaten in de boven- en zijkant van het blikje.
    Beercan chicken
  • Giet wat van de rub in het blikje samen met 2 gepelde teentjes look en een paar schijfjes ajuin.
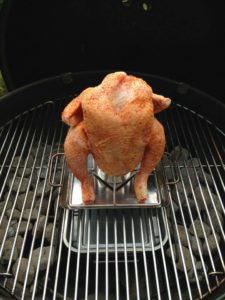
  • Plaats de kip voorzichtig over het blikje. (als alternatief kan je ook een Beercan houder kopen zoals op de foto)
    Beercan chicken
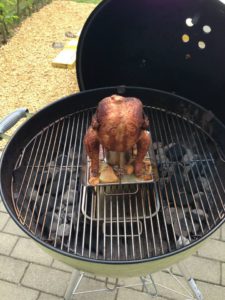
  • Plaats de kip nu in het midden van de barbecue boven de koude zone en sluit het deksel. Zorg ervoor dat de kippenbillen aan de kolenkanten staan, zoals op de foto. Deze moeten immers de meeste warmte krijgen om uit te bakken.
  • Na ongeveer een 45-tal minuten - een uur zal de kip een temperatuur hebben van 80-85°C. Dit meet je best met een bakthermometer  in de dij van de kip (het dikste gedeelte van de bil).
    Beercan chicken
  • Haal de kip met het blikje van de barbecue en laat deze zo'n 7 minuten rusten.
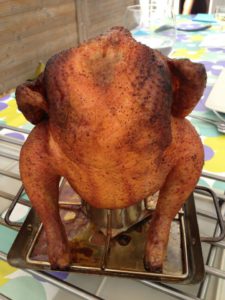
    Beercan chicken
  • Haal nu heel voorzichtig de kip van het blikje. Opgepast want het blikje en het bier zullen nog kokendheet zijn!
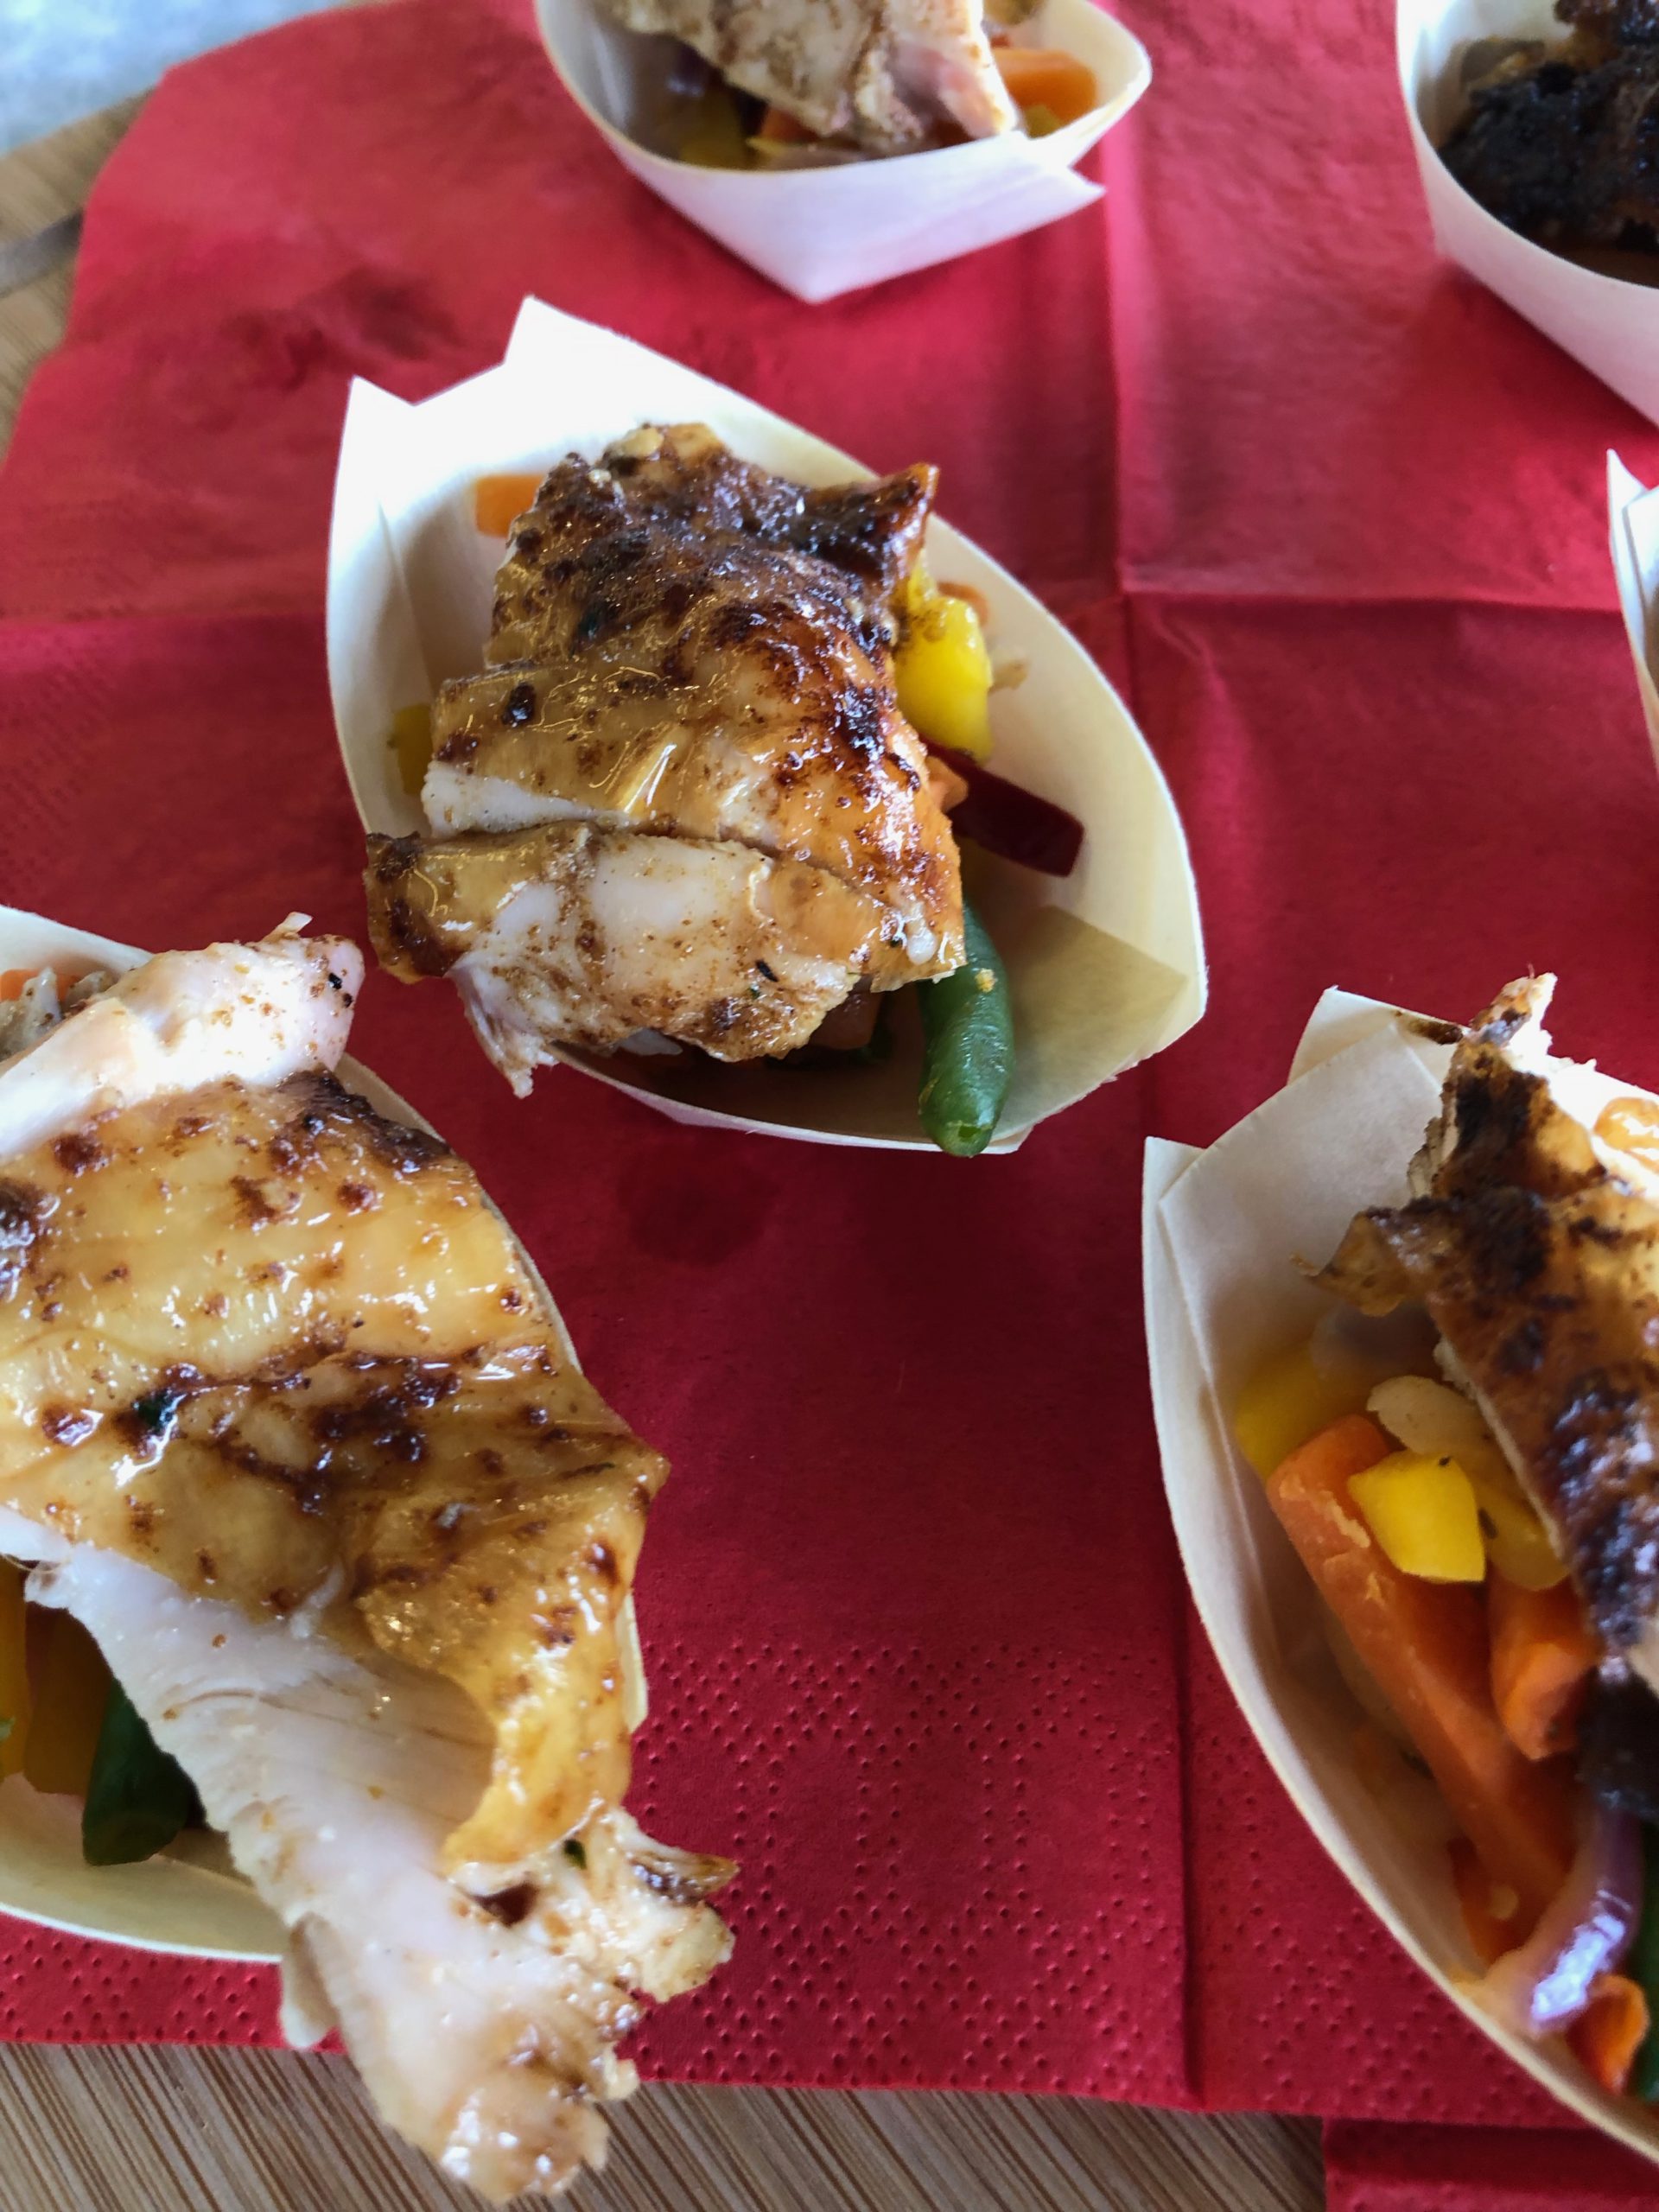
  • Snijd de kip en serveer.
  • Smakelijk!

Categorie: Hoofdgerechten, Recepten Tags: Barbecue, barbecuer, barbeque, BBQ, bbq blog, bbq blogger, bbq gerechten, bbq hapje, bbq recepten, bbq rub, bbqer, beercan chicke, beercan chicken, bier, bierblik kip, blik, blog, borrelhapje bbq, culinaire bbq, directe zone, eenvoudige bbq recepten, eenvoudige en snelle gerechten, eenvoudige recepten, food blog, food blogger, foodie, ghentlemens, Ghentlemens BBQ, grill, grillen, houtskool, kip, kippenkruiden, kolen, Low & Slow, makkelijk bbq, Michel Tiberghien, passioneel, recept, recepten, snel en makkelijk bbq, snel klaar bbq, vurig

Vorig bericht: « Een BBQ aanmaken… in 25 minuten
Volgend bericht: Jack Daniels Honey Whisky Meatballs »

Primaire Sidebar

ghentlemens_bbq

🔥Passionate about Barbecue & Pizza
🔥Follow me for BBQ & Pizza inspiration
🔥DM for collabs, demos & workshops
🔥 Having BBQ & Pizza fun

Publiciteit 🔥 STICKY PORK BELLY BAO. 🔥 Pork belly Publiciteit 🔥 STICKY PORK BELLY BAO. 🔥
Pork belly first grilled hard and crispy on my Weber Genesis, only glazed with sticky barbecue sauce AFTER grilling. That’s how you keep the crust crispy and the glaze sticky.

In between: fresh arugula, tangy kimchi and sriracha mayo for that kick.
Recipe below 👇
 
In collaboration with @weber_belux #webergenesis #baobun @primagaz_belgium #bbqporkbelly
 
For 4 buns.
Ingredients:
•  4 fluffy bao buns
•  600g pork belly without rind, sliced 2cm thick
•  Barbecue rub of your choice
•  100ml barbecue sauce
•  Handful of arugula / rocket
•  150g kimchi
•  Sriracha mayo
 
How to make it:
1. Fire up the Weber Genesis, preheat on high to 200-220°C / 400-430°F.
2. Season pork belly with rub and grill directly. 4-5 min per side until you get that crispy, charred crust.
3. Take it off the grill, glaze generously with barbecue sauce.
4. Steam the bao buns for 2 min on the barbecue, lid closed.
5. Build it: arugula, slices of glazed pork belly, kimchi and sriracha mayo on top. Done.
Crispy on the outside, melt-in-your-mouth on the inside.
 
🔥 Slow Cooked Pork on Pineapple 🍍 This is a great 🔥 Slow Cooked Pork on Pineapple 🍍 
This is a great way to get some flavours combined and add some eyecatching elements to it.
🔥🍔 BURGERS + MELTED CHEESE = BBQ HAPPINESS 🧀🔥 The 🔥🍔 BURGERS + MELTED CHEESE = BBQ HAPPINESS 🧀🔥

There’s nothing quite like a juicy burger sizzling over a hot BBQ… until you add a generous layer of cheese on top.

Grill the burgers over high heat until you’ve built that beautiful crust. Just before they’re ready, add your favorite cheese and close the lid.

Give it a minute.

That’s when the magic happens. 🧀

The cheese slowly melts around the burger, covering every crispy edge in gooey goodness.

Toast the buns on the grill, add your favorite sauce, some pickles and crispy onions, and stack it high.

Juicy beef.
Smoky crust.
Melted cheese.
Toasted bun.

Sometimes BBQ doesn’t need to be complicated to be ridiculously good. 🔥🍔

Who’s taking the first bite? 👇

#Cheeseburger #BBQBurgers #BurgerLovers #MeltedCheese #BBQReels GrillLife BBQLife LiveFireCooking BurgerNight GhentlemensBBQ
🔪🥩 A GREAT STEAK DESERVES A GREAT KNIFE 🥩🔥 A perf 🔪🥩 A GREAT STEAK DESERVES A GREAT KNIFE 🥩🔥

A perfectly grilled T-bone is only half the story.

The final cut matters just as much. With a razor-sharp knife, every slice is clean, preserving the juices and revealing that perfectly pink center from edge to edge.

No tearing. No crushing.
Just smooth, effortless cuts through a beautifully cooked steak.

Because when you’ve spent the time grilling a perfect T-bone, it deserves to be carved with the same level of precision.

Sharp knife.
Perfect steak.
Pure satisfaction.

Sometimes the most satisfying sound isn’t the sizzle on the grill…
It’s the blade gliding effortlessly through a perfectly cooked steak. 🔥🔪

#TBoneSteak #SteakLovers #KnifeSkills #BBQReels #PerfectSteak LiveFireCooking MeatLovers GrillLife GhentlemensBBQ SteakNight FoodPorn BBQLife
🔥🥩 FLANK STEAK — STRAIGHT ON THE COALS 🥩🔥 No grat 🔥🥩 FLANK STEAK — STRAIGHT ON THE COALS 🥩🔥

No grate. No pan. No shortcuts.

Just a beautiful flank steak placed directly on glowing charcoal, where fire and embers create a crust you simply can’t achieve any other way.

Don’t be afraid of the ash—it brushes right off. What you’re left with is an incredible smoky flavor, a deeply caramelized exterior, and a perfectly juicy medium-rare center.

How to do it:
🔥 Prepare a bed of glowing white-hot charcoal.
🥩 Season the flank steak generously with coarse salt.
⏱️ Place it directly on the coals for 2–3 minutes per side, depending on thickness.
🌡️ Finish at an internal temperature of 52–54°C (125–130°F).
😴 Let it rest for 5–10 minutes, then slice against the grain.

Sometimes the oldest cooking method is still the best.

Would you dare to cook your steak directly on the coals? 🔥👇

#FlankSteak #CavemanSteak #SteakLovers #LiveFireCooking #BBQReels OpenFireCooking FireCooking MeatLovers BBQLife GhentlemensBBQ CavemanStyle SteakNight
🔥🍅 BBQ RATATOUILLE — A FRENCH CLASSIC WITH A SMOKY 🔥🍅 BBQ RATATOUILLE — A FRENCH CLASSIC WITH A SMOKY TWIST 🍆🔥

Who says the BBQ is only for meat?

Layers of zucchini, eggplant and tomatoes, slowly roasted in a rich tomato sauce until perfectly tender, with just a hint of smoke from the grill. Simple ingredients transformed into something unforgettable.

🔥 BBQ Ratatouille Recipe

You’ll need:

* 2 zucchini
* 2 eggplants
* 4 tomatoes
* 500 ml tomato passata
* 2 cloves garlic, minced
* 1 onion, finely diced
* 2 tbsp olive oil
* 1 tsp thyme
* 1 tsp rosemary
* Salt & black pepper
* Fresh basil

Method:

1️⃣ Sauté the onion and garlic in a cast-iron skillet with olive oil.

2️⃣ Stir in the tomato passata, thyme, rosemary, salt and pepper. Simmer for 10 minutes.

3️⃣ Thinly slice the zucchini, eggplants and tomatoes.

4️⃣ Arrange the vegetables upright in the skillet, alternating each slice to create a beautiful pattern.

5️⃣ Drizzle with olive oil and season lightly.

6️⃣ Place the skillet on the BBQ over indirect heat at 180°C (355°F) for 45–60 minutes, until the vegetables are tender and lightly caramelized.

7️⃣ Finish with fresh basil and a drizzle of extra virgin olive oil.

🔥 Smoky.
🍅 Fresh.
🌿 Packed with Mediterranean flavor.

The perfect side dish—or a delicious vegetarian main.

#Ratatouille #BBQRecipes #CastIronCooking #VegetarianBBQ #LiveFireCooking BBQReels OutdoorCooking GhentlemensBBQ FrenchCuisine FireCooking FoodLovers
🔥 Fire-kissed shrimp, fresh zucchini noodles, and 🔥 Fire-kissed shrimp, fresh zucchini noodles, and the unmistakable flavor of cooking over the OFYR. Sometimes the simplest ingredients create the biggest wow factor.

🦐 Grilled Shrimp on Zucchini Noodles

Ingredients
• 16 large shrimp, peeled & deveined
• 2 zucchinis, spiralized into noodles
• 2 tbsp olive oil
• 2 garlic cloves, minced
• Zest + juice of ½ lemon
• 1 tsp chili flakes (optional)
• Fresh parsley, chopped
• Salt & black pepper
• Freshly grated Parmesan (optional)

Method

1. Toss the shrimp with olive oil, garlic, lemon zest, salt, pepper, and chili flakes. Marinate for 15 minutes.
2. Grill the shrimp on the OFYR over high heat for 1–2 minutes per side until perfectly charred.
3. Lightly grill the zucchini noodles on the plancha for 1–2 minutes with a drizzle of olive oil—just enough to soften while keeping some bite.
4. Finish with lemon juice, fresh parsley, and Parmesan if desired.
5. Top the courgetini with the grilled shrimp and serve immediately.

Simple. Fresh. Packed with flavor. 🔥

#OFYR #GrilledShrimp #Courgetini #OutdoorCooking #bbqlovers
Publicity🔥 Restaurant-quality chicken shawarma… ri Publicity🔥 Restaurant-quality chicken shawarma… right in your own backyard! 

The Weber Genesis II proves once again that it’s so much more than just a gas barbecue. Pair it with the rotisserie, and you’ll get perfectly even cooking, crispy edges, and incredibly juicy chicken every single time. 🤤 

💡 Here’s my secret tip: 
I sandwich the chicken between two thick slices of pineapple. This keeps everything tightly packed on the rotisserie while the pineapple adds moisture and a subtle sweetness as it cooks. And don’t throw it away afterwards - slice it up and serve it in the pita for the perfect sweet and savoury finish. 🍍 

📝 Recipe 
Ingredients 
* 1.5 kg (3.3 lb) boneless, skinless chicken thighs 
* 3 tbsp shawarma seasoning 
* 1 tsp smoked paprika 
* 1 tsp ground cumin 
* 1 tsp ground coriander 
* 1 tsp garlic powder 
* Salt & black pepper 
* 2 thick slices of fresh pineapple 
* Pita bread 
* Garlic sauce 
* Lettuce, tomato, and red onion 

🔥 Method 
✅ Mix all the spices and coat the chicken thighs generously. 
✅ Place one pineapple slice on the bottom of the rotisserie, stack the chicken tightly, and finish with the second pineapple slice on top. 
✅ Cook on the Weber Genesis II using the rotisserie at 180°C / 350°F for 60–75 minutes, until the outside is beautifully golden and crispy. 
✅ Shave off the crispy outer layer while the rotisserie keeps turning to cook the next layer. 
✅ Dice the grilled pineapple and serve it together with the chicken in a warm pita, topped with garlic sauce and fresh vegetables. 

Do you have a Weber Genesis II with a rotisserie? Let me know in the comments! 👇🔥 

#webergenesis #webergenesisii #rotisserie @weber_belux @primagaz_belgium #chickenshawarma #shawarma bbqrecipe bbqlovers ghentlemensbbq gasgrill grillingseason 
🔥🐑 LAMB RACK ON THE WEBER MASTER-TOUCH — CHARCOAL 🔥🐑 LAMB RACK ON THE WEBER MASTER-TOUCH — CHARCOAL PERFECTION 🐑🔥

There’s something special about lamb cooked over charcoal.

The Weber Master-Touch delivers everything you want: a beautifully caramelized crust, juicy pink center, and that unmistakable charcoal flavor only real fire can create.

Season it simply with salt, pepper, garlic and fresh rosemary. Sear it over direct heat, then move it to indirect heat until it reaches an internal temperature of 52–54°C (125–130°F) for a perfect medium-rare finish.

Let it rest, slice between the bones, and enjoy every tender, smoky bite.

Simple ingredients.
Real charcoal.
Unforgettable flavor.

Because great BBQ isn’t about doing more—it’s about doing it right. 🔥

#LambRack #WeberMasterTouch #CharcoalBBQ #LiveFireCooking #BBQReels GrillLife LambLovers SteakAndChops GhentlemensBBQ FireCooking WeberGrills BBQLife @weber_belux
Volgen op Instagram

Populaire BBQ recepten

overgiet de ARKENSMEDAILLON MET de HONINGMOSTERD-MARINADE
champignon gevuld met boursin en spek
smores 3

Footer

Volg ons:

  • Facebook
  • Instagram
  • Pinterest
  • Twitter

Copyright © 2026 · GHENTlemen's BBQ · Log in